Claude Code: Add Plugin to a Project
Why you should know when to add a plugin to a project VS when to add it to your user scope
In Claude Code, sometimes you want to add a plugin to a project instead of adding it to your user settings. You typically want to do that if the project uses a different technology compared to what you normally use, or perhaps you just want to test how a plugin works before installing it to your user scope. Luckily, Claude Code offers a simple way to do that.
How to add plugin to a project scope
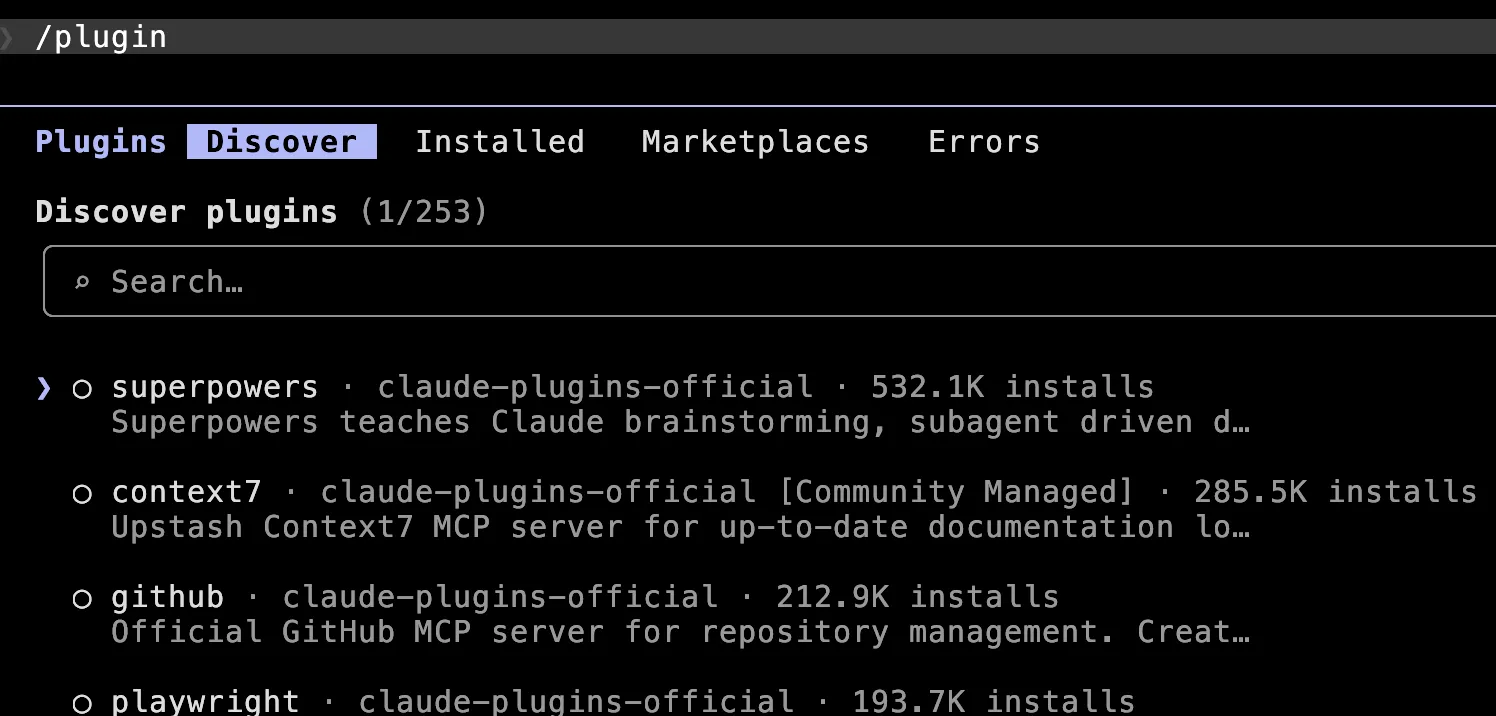
In CC, type /plugin. A new pane will open with a few tabs: Plugins, Discover, Installed, Marketplaces, Errors. In this example, I assume you’ve already added a marketplace that contains the plugin you need, and that now you just want to add a plugin.
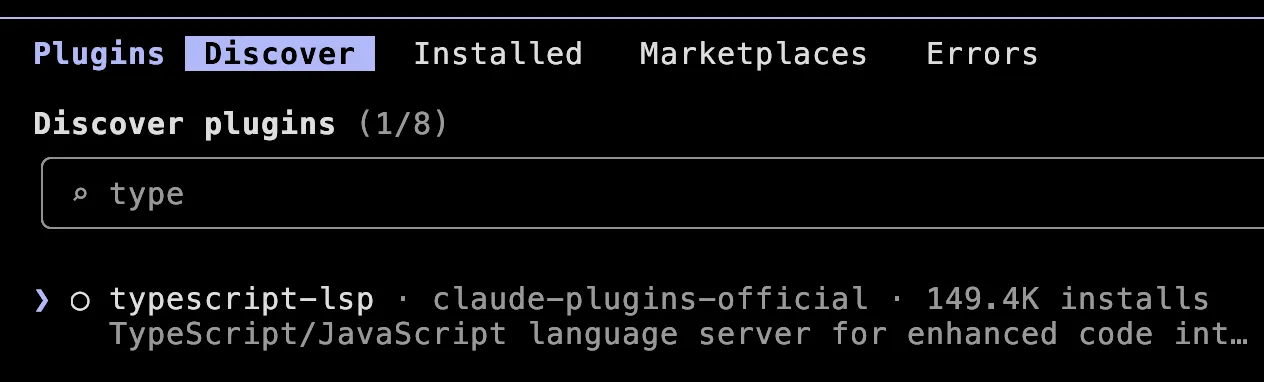
Since this project deals with TypeScript, let’s add a TypeScript language server plugin. I’ll enter “type” in the search box and we see the typescript-lsp plugin from the claude-plugins-official marketplace.
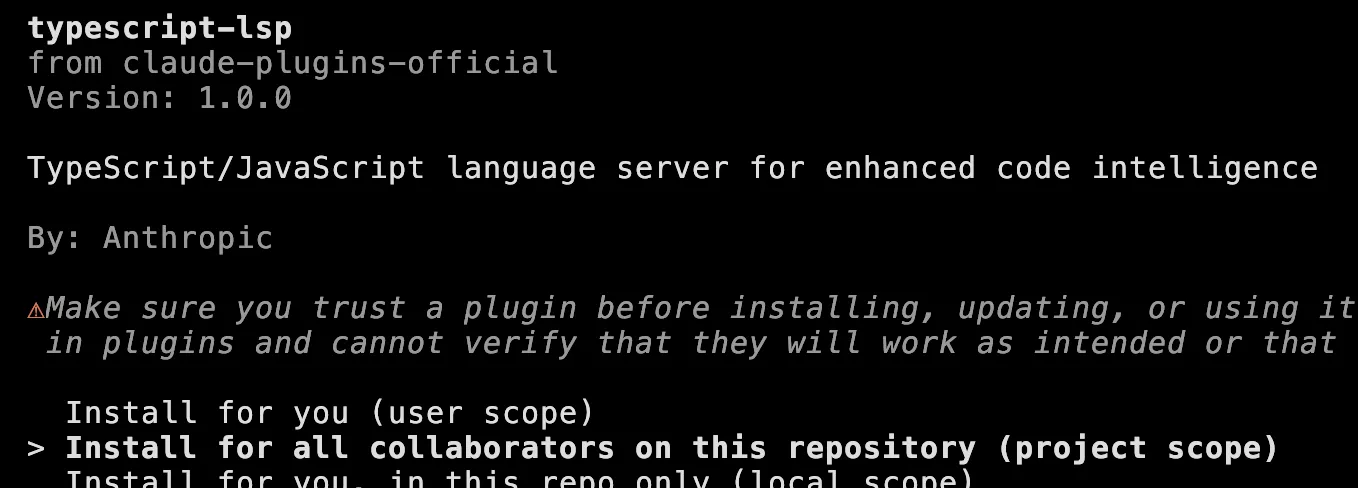
Press the down arrow so that the selection marker points to typescript-lsp and press Enter. You’ll see the plugin details. Here the key point is to select “Install for all collaborators on this repository (project scope)”.
The last step is to run the /reload-plugins command so you can use the plugin you’ve just added.

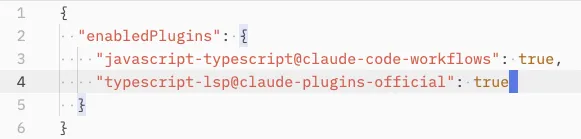
How this works under the hood is that Claude Code added a few lines to the settings.json file in your project’s .claude directory. This means you must commit this file if you want this plugin to be available to other developers working on this project. Using git you could do that with git add .claude/settings.json.
Takeaways and action points
- Add a plugin to a project if you use a different technology or you’re just experimenting
- If you intend to use the same plugin in multiple projects add it to your user scope
Dear fellow developer, thank you for reading this article about adding a plugin to the project in Claude Code. Until next time, TheJavaGuy salutes you 👋!