How to install Java 18 (OpenJDK 18) on Windows
The easiest way to install Java 18 (OpenJDK 18) on Windows
Java 18 is currently the latest version of Java. Even though it isn’t an LTS release, it’s worth installing it so we can test new features. In one of the previous articles I have written about how to install it on MacOS. In this article, I will show you how to install JDK 18 on Windows, add it to the path, and set up IntelliJ IDEA so you can write Java applications against it.
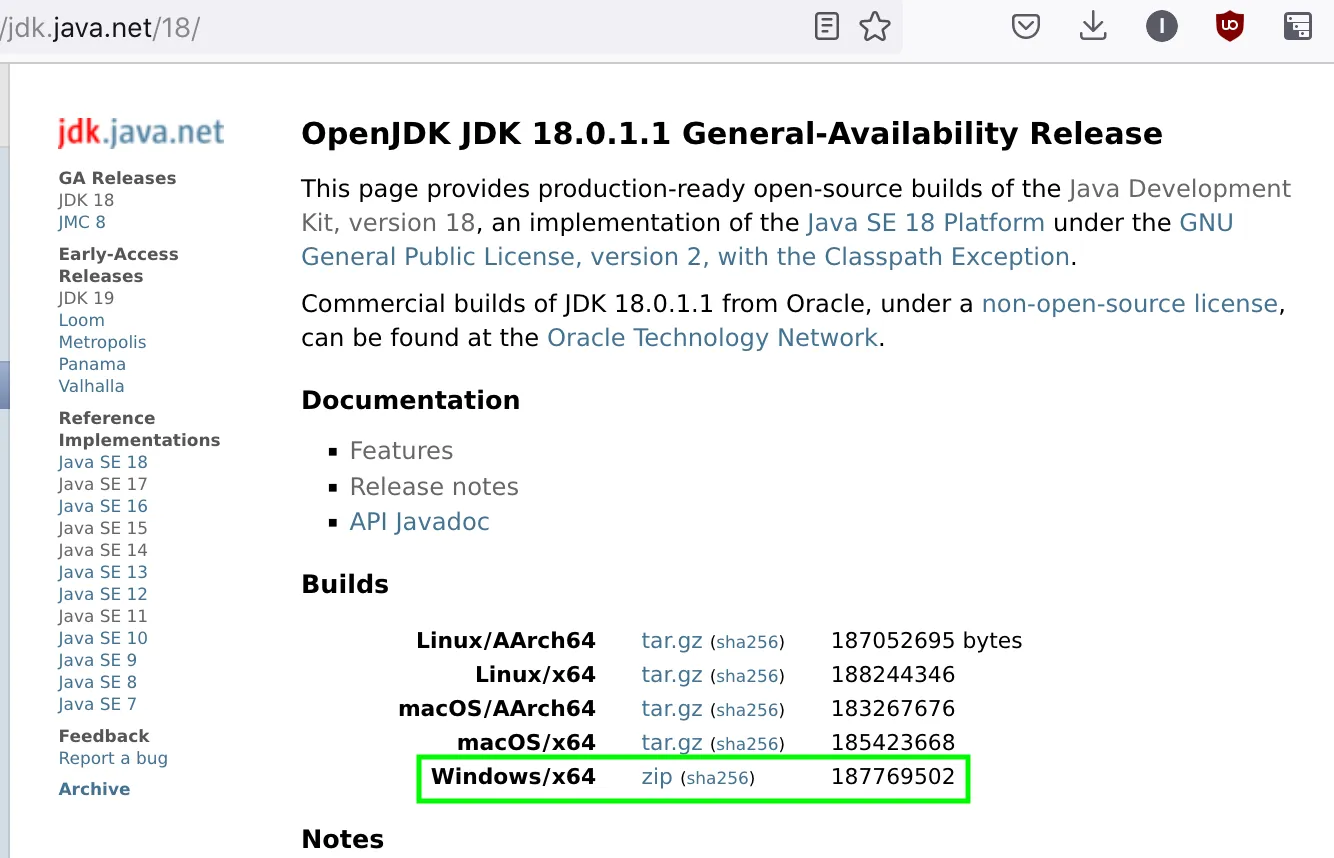
First, you have to visit https://jdk.java.net/18/. Near the top you’ll see the build number and download links for various operating systems. For Windows, choose (obviously) the Windows/x64 zip file.
The archive already contains a directory, in this case jdk-18.0.1.1:

After the file finished downloading, we have to unpack it somewhere. Since I have a few JDKs, I keep them all under the same parent directory, in my case c:\Programs\, with subdirectories for JDK 11, JDK 17, etc. After unpacking the archive into c:\Programs\, you should see a directory structure similar to this one:
c:\Programs\jdk-18.0.1.1>dir
 Volume in drive C is OS
 Volume Serial Number is B23B-1FAA

 Directory of c:\Programs\jdk-18.0.1.1

05/13/2022  08:03 PM    <DIR>          .
05/13/2022  08:03 PM    <DIR>          ..
05/13/2022  08:03 PM    <DIR>          bin
05/13/2022  08:03 PM    <DIR>          conf
05/13/2022  08:03 PM    <DIR>          include
05/13/2022  08:03 PM    <DIR>          jmods
05/13/2022  08:03 PM    <DIR>          legal
05/13/2022  08:03 PM    <DIR>          lib
04/25/2022  08:59 PM             1,243 release
               1 File(s)          1,243 bytes
               8 Dir(s)  15,655,849,984 bytes free
The most important files are in the bin directory, so let’s verify that the proper version is installed there:
c:\Programs\jdk-18.0.1.1>cd bin

c:\Programs\jdk-18.0.1.1\bin>java -version
openjdk version "18.0.1.1" 2022-04-22
OpenJDK Runtime Environment (build 18.0.1.1+2-6)
OpenJDK 64-Bit Server VM (build 18.0.1.1+2-6, mixed mode, sharing)
We can see that the JDK reported version 18, so the installation succeeded!
If you use PowerShell (and not Command Prompt as I do here), run ./java -version
Setting JAVA_HOME environment variable
Now there is a question whether you should set the JAVA_HOME environment variable to point to the JDK 18. Java 18 is not an LTS version, so there is a chance you don’t want JAVA_HOME to point to it, but rather to the JDK 17 (or even JDK 11). But for completeness, here is the procedure.
I use View by: Small icons in Control Panel. If you use View by: Category (which is the default), your Control Panel will look different.
Open Control Panel, click User Accounts and then click Change my environment variables on the left. A new window titled Environment Variables will open, like in the image:
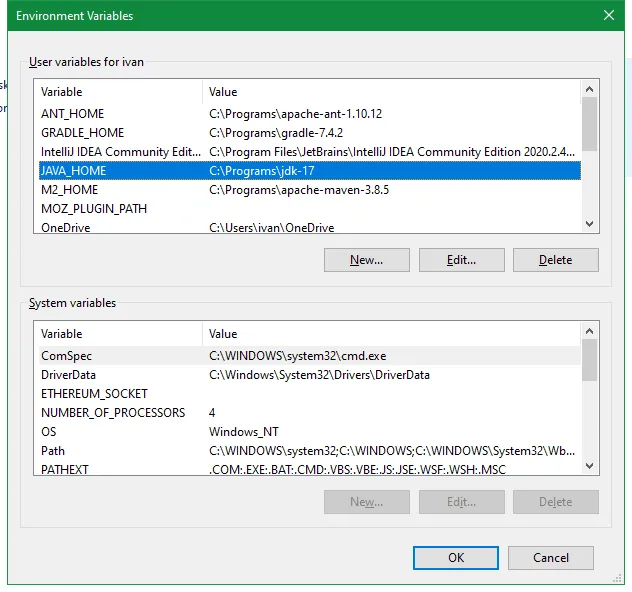
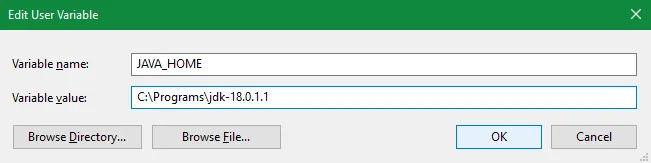
Now there are two possibilities: either you already have JAVA_HOME set (like I do) or you don’t. If you have it set, click Edit… and enter c:\Programs\jdk-18.0.1.1 as a value (or the directory where you have unpacked JDK 18). If you don’t have it set, click New… and enter JAVA_HOME for Variable name and c:\Programs\jdk-18.0.1.1 for Variable value (or the directory where you have unpacked JDK 18), like in the image below:
Click OK, and you should be back to the Environment Variables window. The last step is to add Java to your path.
Adding JDK 18 to PATH
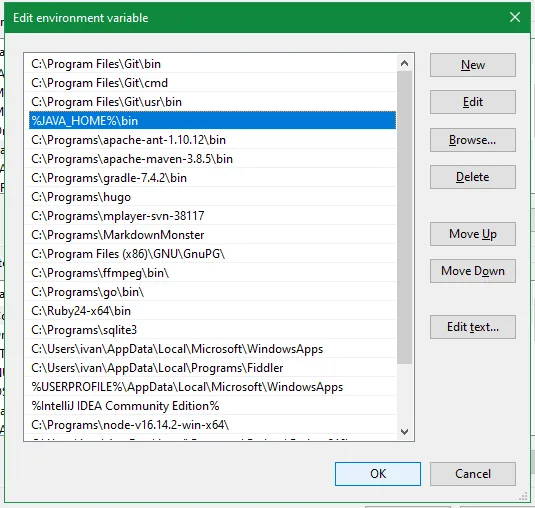
Find the variable called Path in the upper pane of the Environment Variables window. Click Edit… and check if you already have a value %JAVA_HOME%\bin. If not, add it and click OK:
Click OK until you close all the dialogs and close Control Panel. Now open the command prompt and type java -version to see if Java 18 became the default Java version for you. You should see that it is:
C:\WINDOWS\system32>java -version
openjdk version "18.0.1.1" 2022-04-22
OpenJDK Runtime Environment (build 18.0.1.1+2-6)
OpenJDK 64-Bit Server VM (build 18.0.1.1+2-6, mixed mode, sharing)
Adding JDK 18 to IntelliJ IDEA
Now let’s see how to use this JDK from IntelliJ IDEA.
The minimal version of IntelliJ that supports Java 18 is 2022.1! If you use some earlier one, you will be able to add JDK 18 but not to use any of the new features.
In IntelliJ, open any Java project (or create a new one) and go to File/Project Structure. In the Project Structure window, choose Platform Settings/SDKs and click on the + sign at the top.
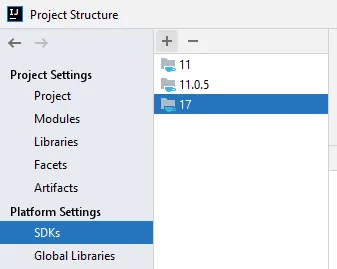
You can always open Project Structure by pressing Ctrl+ Alt+Shift+ S
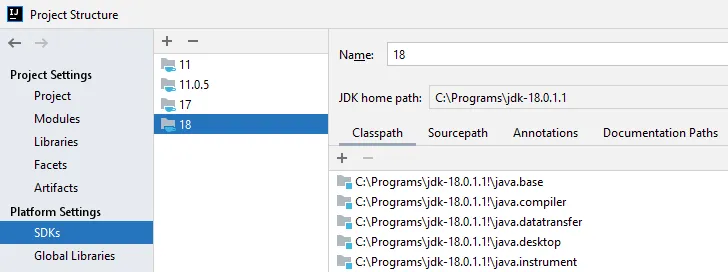
Click on the +, select Add JDK… and IntelliJ will ask you to select the home directory for JDK. Choose the dir into which you have unpacked JDK (e.g. c:\Programs\jdk-18.0.1.1) and you should see JDK 18 added to your IntelliJ. Click OK and it’s done! You’ve successfully set up JDK 18 in IntelliJ IDEA.
Dear fellow developer, thank you for reading this article about installing JDK 18 on Windows. Until next time, TheJavaGuy salutes you 👋!